My baby turned SIX this past weekend. (Ack!) Naturally, being the social butterfly that she is, we had to have a birthday party. She really wanted to have it at a local playground (yes! procrastinating deep housecleaning until summer vacation!), and for the first time, we were letting her invite friends from school.
She had fun, but it didn't exactly turn out as planned. So, if you wanted to know how NOT to throw a party, here you go:
- Pick the hottest weekend in May.
- Host the party at a playground with very little shade over the picnic tables. (Although this does make for some amusement when all the parents are huddled in the shadow of the bathroom building!)
- Ensure that the bathrooms do not have any soap in them. (Thank heavens Auntie R brought hand sanitizer!)
- Invite friends from school - the ones whose parents you don't know & don't have the decency to RSVP, so you can't exactly call them up & see if they're coming so you aren't sure if there will be 25 people coming to the park or 45. (I mean, really!)
- Invite friends from school - especially when they're still little enough bring their parents. (Because then, they can all huddle up and complain about the school. Ostracizing me, cause there's no way you'd catch me in that conversation. I'd like to keep my job, thankyouverymuch.)
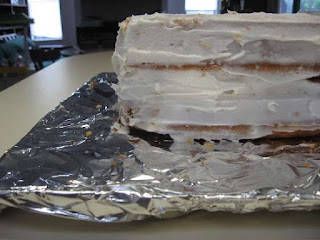
- Put the cake in a shady spot - mainly to ensure the ants eat the cake before anybody else can. (Again, Auntie R to the rescue - she ran an emergency Publx trip for a replacement cake!)
Most importantly, Bird had a really good time, and I had other friends there that I could hang out with & talk to. (Yes, Mom I did the hostess thing & made sure I talked to all the grownups!)
Next year, though, I kind of want to talk Bird into someplace cold.
Showing posts with label birthday. Show all posts
Showing posts with label birthday. Show all posts
Monday, May 11, 2009
Tuesday, January 27, 2009
How To Make An Alligator Cake
 Bug has known for quite some time now that his birthday was in January. Fortunately, he also knew that January came after December and after Christmas.
Unfortunately, his birthday is towards the end of the month, so for a few weeks we had to endure "Is it my birthday YET? It's January! I should be turning four!"
About two weeks before his birthday, we asked him what kind of cake he wanted. The first thing out of his mouth? "Alligator cake mommy!" Not only that, he wanted CHOCOLATE alligator cake.
Huh.
All I have to say is - thank heavens for the Internet!! Turns out that this particular endeavor isn't so hard.
I baked 2 boxes of cake mixes (Duncan Hines devil's food in case you were curious); one in a regular 9x13 rectangular pan, and one in a fluted pan (bundt pan, but not a 'real' bundt pan). Oh, and I also baked lots of cupcakes for Bug to take to school; 6 of them were used for the legs & eyes.
I cut the rectangle into a Christmas-tree like shape (the mouth is the top of the 'tree'), and the bundt cake into thirds. With the leftovers from the rectangle, I added a 2nd layer to the head, and used a bunch of pieces to assemble a tail.

Kind of ugly, isn't it? Very uneven! This is where frosting is your friend. After whipping up a batch, I used it to glue things together & level things out.

Once I'd finished that, I tinted the rest of the icing green (light green mama! dark green alligators are BAD gators! very scary!), I used my icing squirter (how do you like my use of technical jargon) to squirt the stars. Honestly, that's the quickest part of the whole endeavor!
Here's a slightly better overhead shot of him:

I used bamboo skewers (cut into thirds) to anchor the eyes to the cake at the proper angle. The spikes down his back (and the eyeballs) are some generic gummy fish. Because there's nothing like flavored plastic to complete a cake! The teeth & claws are mini-marshmallows. Turns out that if you cut them in half diagonally, they naturally have that 'sharp' point.

And we end with a shot of Bug not-so-patiently waiting for his party to start so he can eat his new friend.

Sunday, January 25, 2009
Four
Dear Bug,
On the day of your actual birthday, the modem celebrated by frying itself. So this is written just a little late. Oh well.
Happy Birthday, Big Boy!! Now you are four years old. And you have been oh-so-excited to tell everyone about it too. Any new ability you have is due to your old age. (My feet touch the floor! It's because I'm FOUR!!) I'm starting to wonder if FOUR is really a verb & not an... adjective??
You requested an alligator birthday cake, so we celebrated by pretending the house was a jungle & had some of your monkey friends come join us. Or maybe we all just acted like monkeys. Whatever. There was laughter & sugar & fun & energy galore!! In fact, between the cake we had at home & the cupcakes you brought to school, you're due for a good old-fashioned sugar crash coma any day now....
It's been lots of fun Bug. I can't quite believe I don't have a toddler in the house anymore. But, if I'm being honest, you've been a toddler in name only for quite some time now. I suppose you do have to grow up sometime, as you are fond of reminding me.
I wish a wonderful year for you Bug. I hope you still want to snuggle every so often.
Love,
Mommy
Thursday, May 15, 2008
The Princess Birthday Cake
How the Cake was Built
To build this year's sort-of-castle cake (Last year's castle can be found here.), I used my 8x8 square pans and my 6" circles. It took 3 cake mixes - one for each square, and one for the 2 circles. I know there are lots of people out there who love to make cakes from scratch, but I am not one of them!!
Once the cakes had baked & cooled (I did this the day before), I applied a base layer of frosting. The reasons for this are twofold: 1) it smoothes everything out, and 2) it makes everything look nice & white & clean.

For example, at this corner there was a huge gap, but you can't tell, can you?!
Here, you can't even tell it was 2 layers!!

Now, this much cake is a bit heavy, so there needs to be some support in the middle of it. Keeps the top from crashing through the bottom, so to speak. I traced my circle cake pan on a thick piece of corrugated cardboard & then covered it with aluminum foil.

Once the base layers were assembled, I made a buttercream fondant. It tastes much better than real fondant, but it's not as stiff, so it has to be assembled in pieces on the cake. I don't mind - gives the castle a bit of a rugged look, but it's probably not the best if you wanted a really formal cake. One of these days I'm going to have to post about how to make the frosting!

Once the squares were covered, I put the circles on top & covered them as well.

This is the point at which I was going to add the towers made of rice krispy treats. Turns out that although they were very tasty & colorful (I combined krispys & fruity pebbles)... they can't stand on their own!
So, we have a towerless castle. They do exist!!
All that was left then was to decorate!! I made regular (pink, of course!) frosting for this part and dyed it with food coloring.

Due to a slight miscalculation on my part, I ended up with way more frosting than I should have. So I added flowers on the other sides to girly it up a bit.

Although this was fun, I'm glad her birthday is only once a year!!!
To build this year's sort-of-castle cake (Last year's castle can be found here.), I used my 8x8 square pans and my 6" circles. It took 3 cake mixes - one for each square, and one for the 2 circles. I know there are lots of people out there who love to make cakes from scratch, but I am not one of them!!
Once the cakes had baked & cooled (I did this the day before), I applied a base layer of frosting. The reasons for this are twofold: 1) it smoothes everything out, and 2) it makes everything look nice & white & clean.

For example, at this corner there was a huge gap, but you can't tell, can you?!

Here, you can't even tell it was 2 layers!!

Now, this much cake is a bit heavy, so there needs to be some support in the middle of it. Keeps the top from crashing through the bottom, so to speak. I traced my circle cake pan on a thick piece of corrugated cardboard & then covered it with aluminum foil.

Once the base layers were assembled, I made a buttercream fondant. It tastes much better than real fondant, but it's not as stiff, so it has to be assembled in pieces on the cake. I don't mind - gives the castle a bit of a rugged look, but it's probably not the best if you wanted a really formal cake. One of these days I'm going to have to post about how to make the frosting!

Once the squares were covered, I put the circles on top & covered them as well.

This is the point at which I was going to add the towers made of rice krispy treats. Turns out that although they were very tasty & colorful (I combined krispys & fruity pebbles)... they can't stand on their own!
So, we have a towerless castle. They do exist!!
All that was left then was to decorate!! I made regular (pink, of course!) frosting for this part and dyed it with food coloring.

Due to a slight miscalculation on my part, I ended up with way more frosting than I should have. So I added flowers on the other sides to girly it up a bit.

Although this was fun, I'm glad her birthday is only once a year!!!
Wednesday, May 14, 2008
A Princess Tea Party
Bird's Fifth Birthday - Part II
Bird's fifth birthday party was this past weekend. This year she wanted to celebrate by having a tea party where everyone dressed up.
She chose to be Cinderella - not really a big surprise!

Once all the royal guests had arrived & run rampant for a bit, we needed to properly adorn everyone. So we made (foam) crowns from this spiffy sticker kit I found on clearance last Christmas. (Yes I was looking for May birthday stuff back in December. Bird's been planning this for a while!)


After some more running around, it was time for lunch, so everyone found a seat at the royal banquet table. Our table featured the best china one can find at garage sales.

Bird had a special pink flowered plate & bowl that didn't look like anyone else's.

The royal feast consisted of peanut butter & jelly or strawberry cream cheese & jelly sandwiches, veggies & dip, and jello cubes (made in an ice cube tray).

Once the guests had feasted to their heart's content (meaning they ate lots & lots of Jello!), we had some more running around before we took a group shot:

(I cannot believe that many children can fit on one couch!)
Next thing we knew it was time to sing Happy Birthday and eat the cake!

Overall, the party was a great success!! Bird was thrilled with the entire thing!!
Monday, May 12, 2008
Flower Cupcakes
Alternative Title: Bird's 5th Birthday, Part I
It took me a while to realize that I would need to make TWO cakes for Bird's birthday festivities. She & I had discussed what sort of cake she wanted for her birthday party, and we were planning away.
I'd clearly forgotten, however, about the ritual to sugar up everyone's children at school. So when she mentioned that she wanted to bring something to school, I went with easy: cupcakes.
She picked chocolate (that's my girl!) with pink frosting. (Dyed with food coloring) I originally saw the flower idea at a party my friend Cindy threw for her daughter, and couldn't wait to use it!
And in an unrelated note... I am amazed at the difference when one does not use the camera flash!


As luck would have it, she had school on her actual birthday, and I was able to go there & ahve lunch with her. Afterwards, these went over very well with her classmates. Well, except for the kid who doesn't like much of anything, but he doesn't count.
Thursday, May 8, 2008
Five
Dear Bird,
You earned your nickname before you were born because of the way you fluttered around inside of me. Even then you were ready for a party when people were around - it seemed like you recognized certain voices, and would get excited whenever you heard them.
Then you came out, immediately making your presence and preferences known. (Food! Snuggle! Sleep! Now!) Even at the very beginning, you wanted to sleep with your arms out as far as you could reach them. The nurses kept swaddling you entirely, but we knew better - you stopped crying as soon as we freed those arms and then we all had a blessed hour or two of rest.
You have always been a lovebird - always happy to snuggle, always happy to take care of your friends and your toys (and eventually your brother). You have an incredibly gentle & nurturing side, as is demonstrated by the number of dolls and stuffed animals that you put to "bed" each night in your room.
You love to sing and dance. You love to draw and write. You love dressing up, and will happily wear a dress (of any kind) before any other type of clothing. You are always up for a trip to Sea World.
Today you are Five, my sweet Bird. Happy Birthday! I love you very much.
Love,
Mommy
Tuesday, April 8, 2008
Egg-Free Monsters Jumping on the Bed
Shortly after Bug turned a year old, we figured out he was allergic to eggs. Once we completely cut them out of his diet, his skin started clearing up, and in general he became a much more likeable person. (Or maybe it was the fact that he could crawl. Whatever.)
He hadn't outgrown his allergy by the time we reached his second birthday, which meant I was tasked with making an egg-free cake for him. Because he was going to eat cake! Already he had a far sweeter tooth than Bird did at that age, and he was also old enough to notice that I was not letting him eat cake at other parties. (Not to mention he was getting tired of graham crackers.)
Since he was turning 2, he really had no opinions as to the type of cake he wanted. So I decided to base it off of his favorite book, Five Ugly Monsters - a tale of lots of ugly monsters jumping on the bed & bumping their heads.
Here's how it turned out:

The Recipe
Not sure where I found this, but it was oh-so-easy! Especially for those of us who do NOT make cakes from scratch. Unfortunately, this is not for those who have wheat or milk allergies.
INGREDIENTS
· 1 (5 ounce) package non-instant pudding mix
· 2 1/3 cups milk
· 1 (18.25 ounce) package cake mix
· 2 cups semisweet chocolate chips (optional!)
DIRECTIONS
1. Preheat oven to 350 degrees F (175 degrees C). Lightly grease one 9 x 13 inch baking pan.
2. Combine chocolate pudding and milk in a saucepan and cook over medium heat until thick, stirring frequently.
3. Remove pan from heat and add in dry cake mix. Mix together and pour into the lightly greased 9x13 inch baking pan.
4. Evenly spread the chocolate chips over the top of the cake. (Note: Do not do this if you plan on frosting the cake later!)
5. Bake at 350 degrees F(175 degrees C) for 40 to 45 minutes. Let cake cool and serve.
Editorial comments - I could only find cookable chocolate or vanilla pudding at the store. I put chocolate pudding in with the chocolate cake mix, and vanilla with the yellow cake mix. Make sure you are reading the labels; they do not necessarily come in 5oz packages.
Now, eggs are apparently one of the things that will make a cake rise, so while this cake is moist & delicious, it is very flat. If you look closely at this shot from the foot of the bed, you can see the chocolate layer - that was from one cake mix, and it's maybe 2 inches wide.

Because of that, the actual bed part is 2 batches - so double all the ingredients.
In order to make the headboard & footboard, I cut the 9x13 cake across into 2/3 and 1/3 pieces Then I used a compass (drawing, not direction) to draw an arc on a sheet of paper, cut it out, and used it as a stencil.
The Frosting
I will unashamedly admit to using chocolate frosting out of a can. There is only so much one can do!
The red is my frosting. (A box or 2 of confectioners sugar, 1 tsp of vanilla, a scoop of Crisco, and enough milk to make it the consistency I wanted.) It took an entire pot of Whilton dye, and an awful lot of a bottle of food coloring to get it that red. (And yes, it had to be red. The boy in the book had a red comforter!) Consequently, it took an awful lot of extra powered suger to thicken the frosting & keep the stuff from looking like stage blood. It was still a little runny, so when I used the straight-tip, the stuff kind of melted into itself, making for a smooth, stripy-looking comforter.
The Monsters
I really wanted monsters that nobody knew. After all, it wasn't like this was a Sesame Street party or anything. Thus began a really long search that ended nowhere. EVERYthing in all of the stores were licensed characters. Apparently we don't make up too many characters of our own anymore.
Finally, as I was falling asleep one night, I remembered owning some monsters. And I also remembered keeping a plastic container of all sorts of plastic creatures. All I had to do was find it in the attic. Thankfully, a couple of hours later, I was successful!
On the bed... the blue monster is Figment in a space suit. The purple & green monsters were from a MacDonalds Happy Meal sometime in the mid-80s. The red monster was from a Wendy's Happy Meal - probably around the same time. I have never been so happy to be a pack rat!
The one licensed character I couldn't avoid is Sully (from Monsters Inc). He wasn't quite tall enough, so I have him propped on some extra pieces of chocolate cake.

The little boy is Harry (not Potter), though Bug was convinced it was him. Even though Bug doesn't have red hair.
Tuesday, March 4, 2008
A Castle Cake for a Princess Party
Note - Bird turned four in May 2007. She loved that party so much that she wants a semi-sequel for her 5th birthday. Part of that means another castle cake, so I'm trying to remember how I did the first one!
Bird has loved pretty, sparkly things for as long as I can remember. She loves to dress up - even if that just means wearing her normal dresses (and not costumes or the like.)
So when she turned 4 last year, it wasn't exactly a surprise that she wanted a princess birthday party. Thankfully, it was just generic princesses, so we had free reign to do all sorts of non-Disney things.
Husband decided to turn our dining room into a castle. He got the really big appliance boxes from our local Home Improvement store, and spent his time the night before the party putting this together:

It kept him busy while I worked on decorating this masterpiece.

Bird's only real request for the party (aside from the princess theme) was that she wanted a castle cake. At first, I thought she meant something easy - bake the cake in a castle-shaped pan. Even nicer - it was a current pan at that time, so it only necessitated a trip to the craft store to buy it.
But no. Although she thought it looked pretty, she said she wanted something that looked like a castle. And castles aren't flat. Which left me rather stumped.
Thankfully, a friend pointed me in the direction of this site, and I found all sorts of castle shaped cakes. Let me tell you, there are some talented people out there!! I saw all sorts of configurations - some of which I figured I could do, and lots more that I couldn't. I had it narrowed down to a couple of easy ones, (ones I actually knew how to frost) and finally called her over to pick the type she wanted.
Except I forgot to close the window for this one. The one I pointed out to Husband cause I thought it was so pretty. The one I figured I couldn't really do in a million years.
The one where she actually said "Oh Mommy, that one is BEAUTIFUL!!!" (Seriously. She was only 3 and she actually uttered those words. How could I deny her?!)
There were several hurdles requiring my attention:
- I did not have the pans this cake required. (Thank heavens for several weeks and those 40%off coupons for those local craft stores!)
- I did not know how to make fondant frosting. Nor do I like the taste of real fondant frosting. (I eventually found a recipe for buttercream fondant frosting that tasted really good, but I'll save that for another post. Probably when I have to make another castle cake!)
- Something in the cake had to be egg-free, so that Bug could eat it too. (I finally settled on making egg-free cupcake towers. )
The actual construction of the cake took a couple of days. The party was on a Saturday. I baked all of the parts on Wednesday and Thursday, saving the actual decorating for Friday night.
In the end, the body of the castle was 2 8-inch square pans, with about a box and a half of cake mix split between them. The circles are 2 6-inch circle pans, with about a box of cake mix split between them.
For stability, there is a cardboard square between the 2 square cakes and a cardboard circle between those two layers as well.

The bottom half of the towers are regular sized cupcakes; the top half of the towers are mini cupcakes. The tower tops are indeed ice cream cones. I'd thought about either melting pink chocolate over them or just covering them in pink sprinkles, but I was too tired. I used a single 12-inch shishkabob skewer to vertically hold the tower together. It took a couple more skewers to anchor the tower to the body of the cake. (I did that after I did the white frosting on the towers)

Fondant (even buttercream fondant) is a tricky mistress. It looks really good, but if you haven't covered up the cake underneath, it will show every mistake. So I had to frost the cake with regular (homemade) frosting first. Then, once I'd mixed & rolled out the fondant, I could cover the cake with it. I went in 3 stages: the square parts first, then the circles, and finally the towers. I actually did not frost the cupcakes all around - I wanted them to look a little more stone-like, so I only frosted the tops to help them stick together, and then wrapped the tower in the fondant.

Once I had a while castle, I made a huge batch of regular pink frosting and went crazy.
The morning of the party, I heard Bird get up and go out into the kitchen. Then she went into the dining room. Then she finally made her way to our room. She came up to me and asked "Are those castles for me?" When I told her they were, she responsed "They are so pretty! I love them!!!"
Thank goodness!!
Wednesday, January 23, 2008
Happy Birthday Bug
Today you are 3.
If I wanted to be technical, I'd say that tonight around 9:44PM you are three, but since you thought your birthday was last Saturday when we had your party, I don't think you are too interested in technicalities.
You shot into this world a month early and shocked all of us - especially me, since I was trying to take a nap when you decided you wanted to come out. You very loudly voiced your opinions when you were born, and not much has changed since then. It's just that I understand (English) words far more than loud screaming.
You were such a serious baby - it took so much effort to make you smile. Although... it made your smiles that much more precious when you did. Looking at you today, I am tickled every time I see you grin and giggle at me.
I love that you are ticklish and that you love to be tickled (some of the time at least). I love how your eyes light up when you are happy. I love that you love books, and never tire of begging people to read them to you. I love that we can still cuddle.
You love trains, cow & doggy, Elmo, cars, trucks, milk, books, Mommy, Daddy, and Bird.
You have an adorable little dance that you do when you tell me that Daddy's running.
You love to jump.
One of your favorite games is to lure me out of my seat to go do something, and then fly across the house to sit in my seat and laugh at me when I discover you.
You could play in the bathtub for hours if we would let you.
Happy Birthday, Big Boy. Love you!!
Sunday, January 20, 2008
How to Make a Train Cake
Bug's 3rd birthday party was yesterday - the theme was trains. Well, Elmo and trains, but that was cause it was easy to find paper plates and plastic bags with Elmo on them. (It was a train birthday party, not a Thomas birthday party, and apparently you can't have a party if there are no licensed characters involved.)
Anyways, one of my creative outlets is making spiffy birthday cakes for my kids. So I decided to try a train cake this year. After finding inspiration from the insanely tiny picture here, I bought my cake mix & mini-loaf plans and was ready to go!
Two boxes of cake mix (I prefer Duncan Hines as opposed to Betty Crocker; they taste the same but I find the DH cakes much easier to build with.) was enough to bake 8 mini-loafs of cake. Remembering to grease the pans would have been a good idea. Thankfully, I had 5 decent loafs, and parts of the other 3 to work with.
My plan was to have a 5-car train: engine, tinder, flatcar, boxcar, and caboose. After some trimming & leveling with my gigantic kitchen knife, I assembled the skeleton of the train as seen here:

Next up was to do the base layer of frosting. The main reason for doing this is because it will glue all the pieces together, as well as cover up any mistakes that may have occured (a crack here, a chipped corner there). I do make my own frosting - powdered sugar, a glop of plain crisco, a dash of vanilla (use clear if you need pure white frosting; otherwise it doesn't matter), and enough milk to make it all congeal together when you beat it with your mixer. More sugar will make it stiffer; more milk will thin it out. Tip: If you have slightly runny frosting, it will have a nice smooth glaze when it dries and sets - a plus if you plan on covering your cake with fondant frosting or drawing a picture on top.

(sorry about the quality of the photo, but it's the only one I took!)
Finally, the colored frosting!! After checking which dyes I actually had (food coloring just doesn't do it for me - I like much more vibrant colors), I essentially settled on a rainbow cake. It was incredibly tedious to keep rinsing the bowl & tools every time I switched colors, but the end result was worth it!


The wheels are mini-oreos and the "tinder" is crushed mini-oreos. The "logs" in the flatcar are mini Crunch bars.
Bug LOVED the cake, and couldn't wait to eat it. He claimed the front part of the locomotive - so he could have both cookies and marshmallow. And frosting. LOVED the frosting. Come to think of it... I don't think he actually ate any of the cake!!
Tuesday, August 28, 2007
Post birthday wrapup
My birthday actually turned out to be really nice. I received TWO cakes from students in my first period class. We all ate them for breakfast (chocolate is much better than a fruit smoothie). The rest of my classes - unbidden, I might add - sang Happy Birthday to me (cause I am not above writing my own happy bday note on the board).
My own children were not at all cranky when I picked them up (okay, that's not entirely true, but it sounds good), but after a quick visit to the gym we went to my sister's for a spaghetti dinner & another chocolate cake. mmmmmm.
Husband managed to get the word out, and I have 3 seasons of Gilmore Girls to watch now. Yay!!
To top it off, as I type this post, Bug has just said Bird's name for the first time. I am over the moon!! :) :)
Monday, August 27, 2007
Happy Birthday to Me!!

I've hit many of the major adult milestones... college graduation... marriage... 1st house... 1st car... 1st (real) job... pregnancy & children... and when I'm feeling particularly cranky I wonder what could possibly be left for me to do.
Then I am gently reminded that there are all sorts of things I am supposed during my stay here on Earth, and I wonder how I will ever finish everything in the time I have.
It's been a wonderful ride so far, and I look forward to what happens next.
My age? Well if you must know... and you aren't colorblind...

But enough philosophizing. I want some chocolate!!!
Subscribe to:
Posts (Atom)